


")


11 Jun

Posted By
1 Comment(s)
3428 View(s)
Required Hardware and Software for programming ATtiny85
Steps for preparing Hardware for programming.
Install Arduino IDE on your computer
In Arduino IDE, you can install the ATtiny support using the built-in board's manager.
- Open the preferences dialog in the Arduino software.
- Find the “Additional Boards Manager URLs” field near the bottom of the dialog.
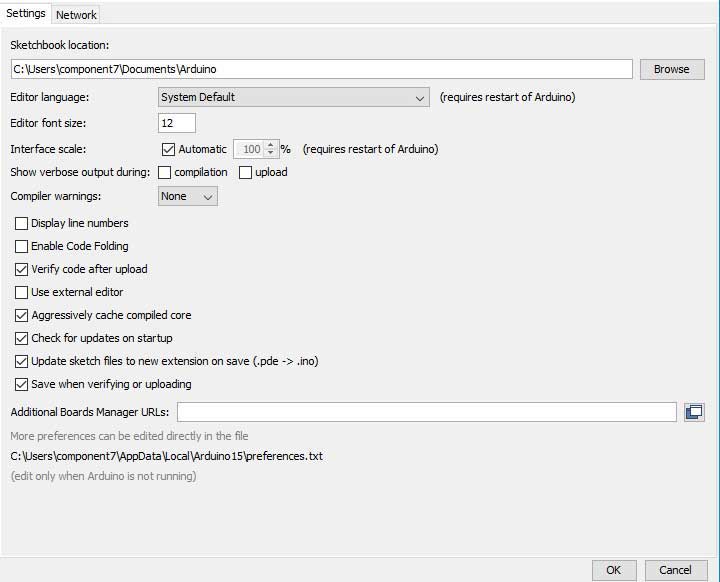
- Paste the following URL into the field (use a comma to separate it from any URLs you’ve already added):
https://raw.githubusercontent.com/damellis/attiny/ide-1.6.x-boards-manager/package_damellis_attiny_index.json - Click the OK button to save your updated preferences.
- Open the boards manager in the “Tools > Board” menu
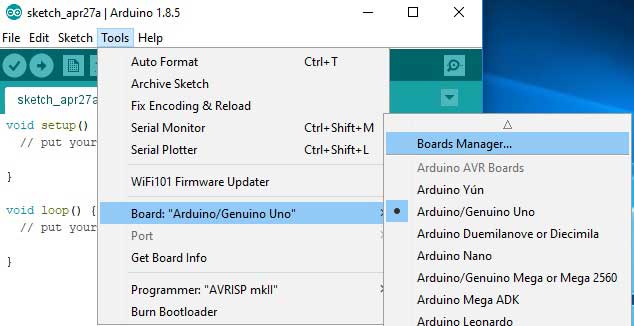
Scroll to the bottom of the list; you should see an entry for “ATtiny"

- Click on the ATtiny entry. An install button should appear. Click the install button.
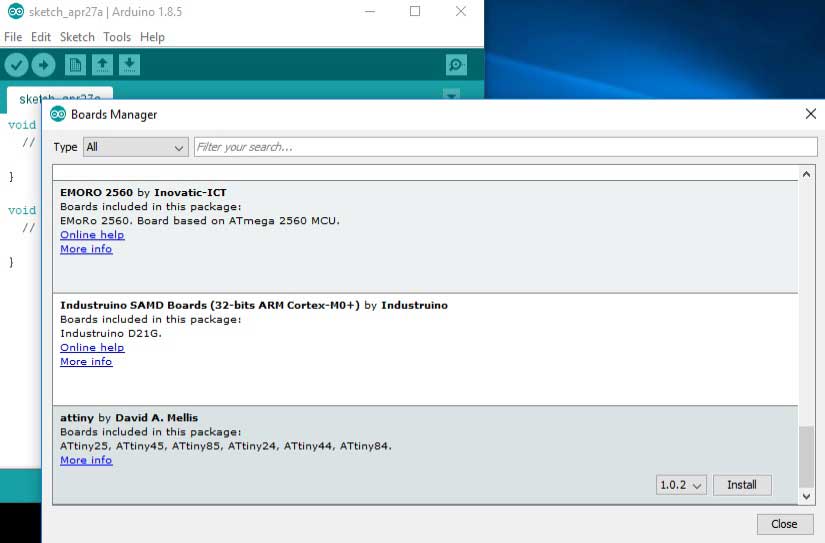
- The word “installed” should now appear next to the title of the ATtiny entry.

- Close the boards manager. You should now see an entry for ATtiny in the “Tools > Board” menu.
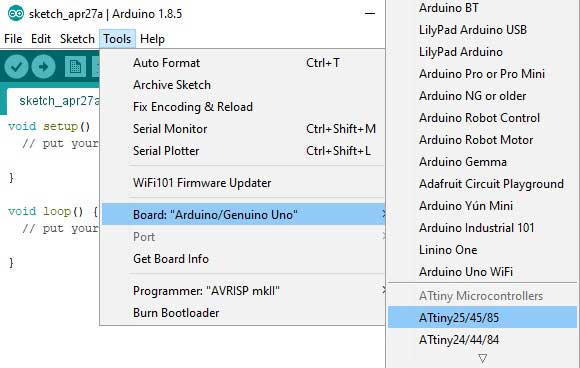
- Restart the Arduino development environment.
- You should see ATtiny entries in the Tools > Board menu.

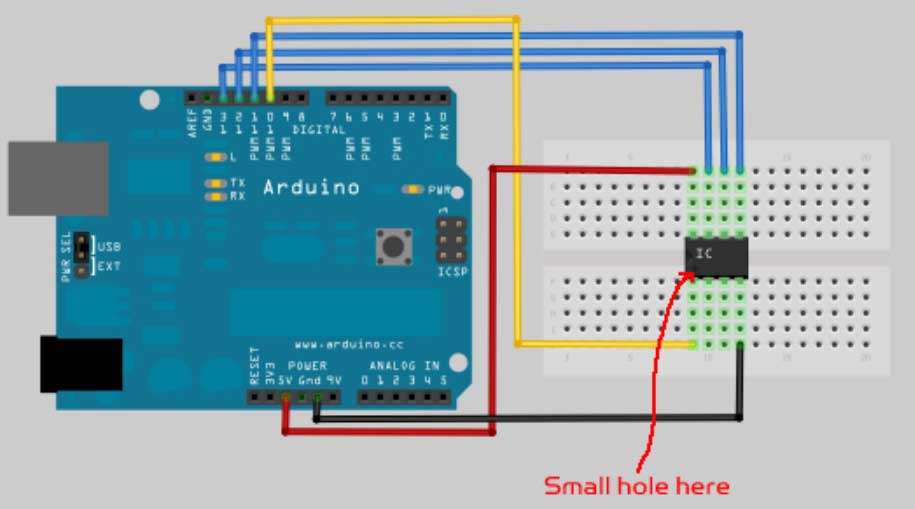
Connecting the ATtiny with Arduino UNO R3
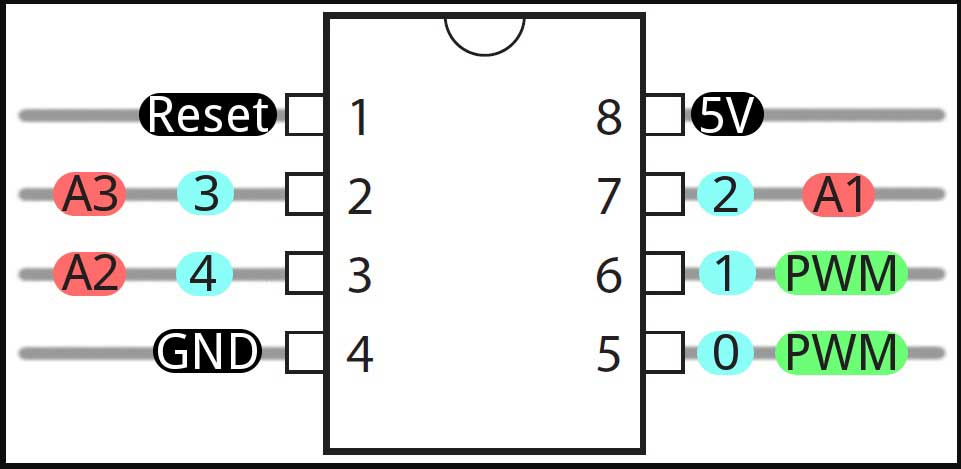
You’ll need to provide power to the ATtiny and connect it to your programmer. That is, connecting
MISO, MOSI, SCK, RESET, VCC, and GND of the programmer to the corresponding pins on the ATtiny.
Instructions and diagrams are available for:
- Open the Blink sketch from the examples menu.
- Change the pin numbers from 13 to 0.
- Select “ATtiny” from the Tools > Board menu and the particular ATtiny you’re using from the Tools > Processor men.. (In Arduino 1.0.x, these options are combined in just the Tools > Board menu.)
- Select the appropriate item from the Tools > Programmer menu (e.g. “Arduino as ISP” if you’re using an Arduino board as the programmer, USBtinyISP for the USBtinyISP, FabISP, or TinyProgrammer, etc).
- Upload the sketch.
Configuring the ATtiny to run at 8 MHz


1 Comment(s)
nice\r\n\r\nhttps://dpsswitches.com/
Leave a Comment